
|
|
|
This article acts as a guide to the Docman Hub system.
To navigate the topics, use the Table of Contents on the left.
The Hub console provides access to the configuration options and statistics related to Hub transmissions. To access the Hub console, take the URL of the Hub and add "/edtweb" to the end.
The Hub console login screen opens. Enter the login supplied to you by your Hub administrator and press login.

Once you press Login, the Hub Activity Summary screen opens.
Upon logging into the Docman Hub console, you are presented with the Dashboard. This screen displays the Hub document count, split into several categories.
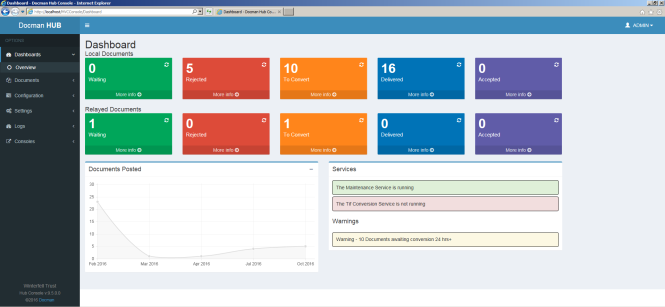
The dashboard provides information on documents sent through the local Hub and Relayed from other Hubs.
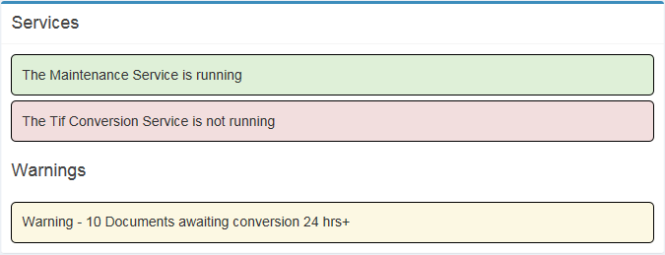
The bottom right hand side of the Dashboard displays the status of Hub services. The Warnings section displays warnings if there are overdue End Points, or unconverted Hub documents.
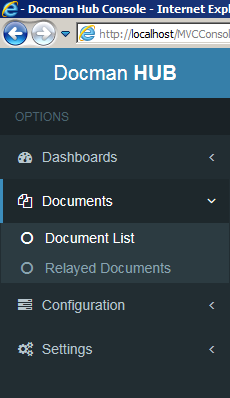
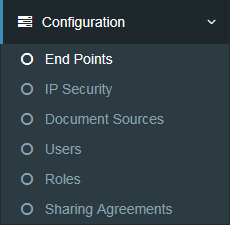
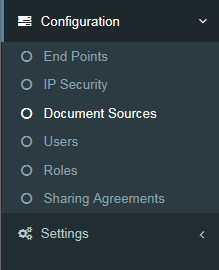
The options pane on the left allows you to view and configure the Hub.
|
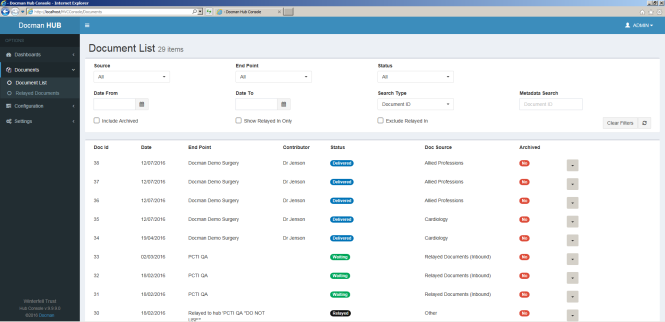
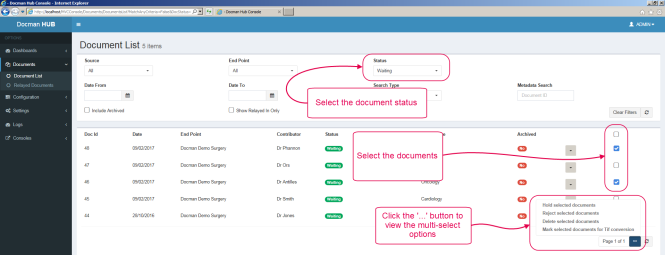
The document list will display a list of documents stored on the Docman Hub. The documents are displayed in date order with the most recent at the top. It is possible for you to apply filters to change the way in which documents are displayed. |
||||||||||
|
|
||||||||||
|
Coloured Status markers display the current status of each document.
|
|
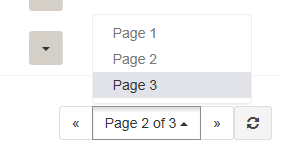
The Document List will only display up to 30 lines of information. To view older/newer details you can navigate using the page drop-down menu or Next and Previous buttons at the bottom of the list, as shown in the screen shot below. |
|
|
|
If one of these buttons is missing it means you are at the beginning or end of the list. |
|
The filter panel allows you to reduce the number of documents you can see in the list by only displaying documents which match your filters. |
|
|
If you are looking for a document from Biochemistry for a patient with the surname of Jones you can set your filters as shown below:

When you select a filter setting from the drop-down lists, the Document List will automatically update. However, when you add text to the Metadata Search, you will need to press Enter to cause the Document List to update.
Document multi-select is becomes available when documents are filtered by Status. This is because the actions available on a document depends on its current status.
|
Note: Multi-select only selects all documents on the current page. |
To View or Edit a document, click on the  drop-down icon located in the far right hand column of the Document List, and then click Change Status & View Document Data.

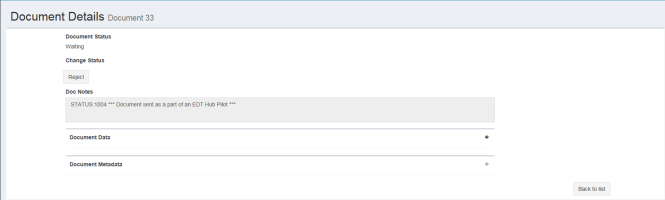
In the document details you will be able to see when the document was added, the status of the document, where it comes from and where it is going to. Unlike older versions of Hub, there is no Save button at the bottom of the document details; changes are saved automatically.
The options alongside Change Status change depending on the current status of the document. Documents that have been rejected give a rejection reason, and the option to Delete or Resend. Notes stored with a document may also be updated by typing in the Doc Notes field and clicking Update Notes.
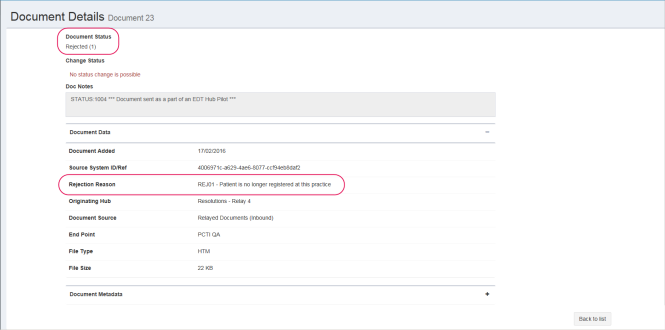
Rejected documents are documents that were transmitted to an End Point, but rejected and sent back to the Hub. Rejections may take place on the Hub (Rejected by System) or at the End Point (Rejected by Receiver).
An End Point may have one of a variety of reasons to reject a document, and they are prompted to provide the rejection reason when running through the document rejection process. This reason is displayed along with the document details so that the hub may process the rejected document and take appropriate action.
Potential rejection reasons from an End Point are as follows:
| Rejection Code | Rejection Reason | Description | Suggested Action |
|---|---|---|---|
|
REJ01 |
Patient is no longer registered at this practice |
Patient was registered at the End Point, but has since moved to another. |
Re-check the patient and End Point details and re-send to the correct End Point. |
|
REJ02 |
Patient never registered at this practice |
Patient has never been registered at this End Point. |
Re-check the patient and End Point details and re-send to the correct End Point. |
|
REJ03 |
Incomplete document |
Transmitted document is missing information. |
Re-check the document and recapture if necessary to provide missing information, then re-send. |
|
REJ04 |
Document cannot be viewed |
Transmitted document is corrupt or not of legible quality. |
Re-check the document and recapture if necessary to improve quality, then re-send. |
|
REJ05 |
Duplicate document already received |
Document quality is appropriate, patient is registered at the End Point, but the document has already been received by the End Point. |
Document does not need to be transmitted to the End Point again; delete. |
|
REJ06 |
Custom rejection reason |
REJ06 allows the user to input free text as a rejection reason. |
The reason varies depending on the free text added by the site - therefore, the suggested action varies depending on the custom reason. |
|
Warning: The Meta data is determined by the sender and cannot be changed. If you do attempt to make changes they will not be saved. If the information is incorrect the document should be rejected and the sender will need to resend the document with the correct information. |
|
Relayed Documents are documents that are sent to End Points on other Docman Hubs. There are times you may want to search the Relayed Documents; for example when a document does not reach its endpoint. This Relayed Documents screen will only display outbound documents; i.e. Documents being sent from your Docman Hub.
|
|
|
|
|
When you view the Relayed Documents screen you will be presented with a filter panel that will allow you to narrow your list according to filter settings. Click on the list box buttons to reveal a list of options to pick from or type the document reference directly in to the Doc Ref box. |
|
|
|
|
|
You can filter by the document status using the Status drop-down menu. |
|
|
|
|
|
Click on the View/Edit button on the right hand column of the document record to view the document details. |
|
If you have more than thirty relayed documents you can use the Previous and Next buttons to navigate the list. |
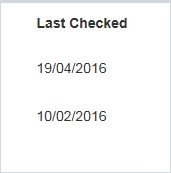
The Last Checked column displays the last time that the status of the document on the Relayed Hub was checked by the Local Hub. The status of each document is checked automatically on a regular interval, stopping when the document is 14 days old. After this point you can check the status of the document manually by clicking the Recheck button.
![]()
![]()
The filter allows the user to limit which individual logs are shown at any given time. The filter is applied to all transmission logs stored on the Docman Hub to narrow down the view to the individual logs you are looking for.
As and when the filter is changed the transmission log will automatically reload, displaying logs matching your criteria only.
![]()
|
To view the detail contained in a transmission log, click on the |
|
When you click on the View button the Transmission Detail screen will appear: |
|
|
|
Click on the Back To List button to return to the Transmission Log. |
General
Authentication
Available
Downloaded
Delivered
Error
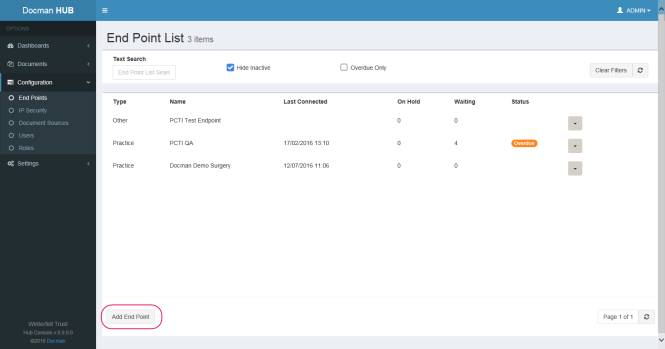
The end point list displays all end points which are setup on the Docman Hub. Filters are provided to enable you to easily narrow your search for an End Point in the list.
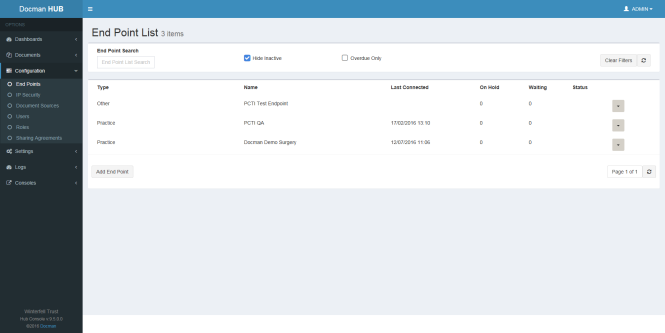
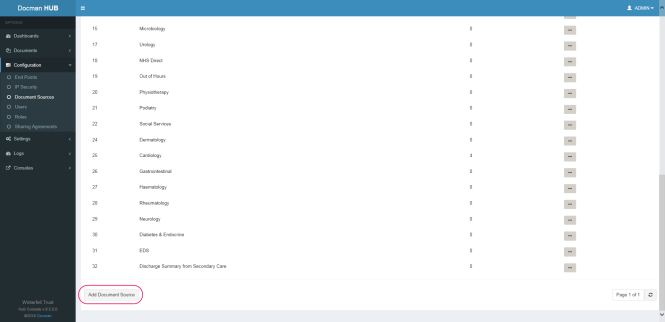
This list will only display a maximum of thirty records. Use the Prev and Next buttons to navigate the list.
|
To add a new End Point to the Docman Hub, scroll to the bottom of the list and click on the Add End Point button.
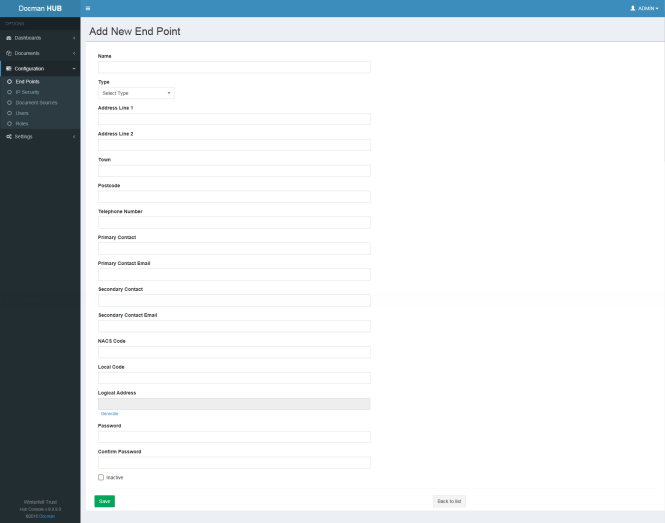
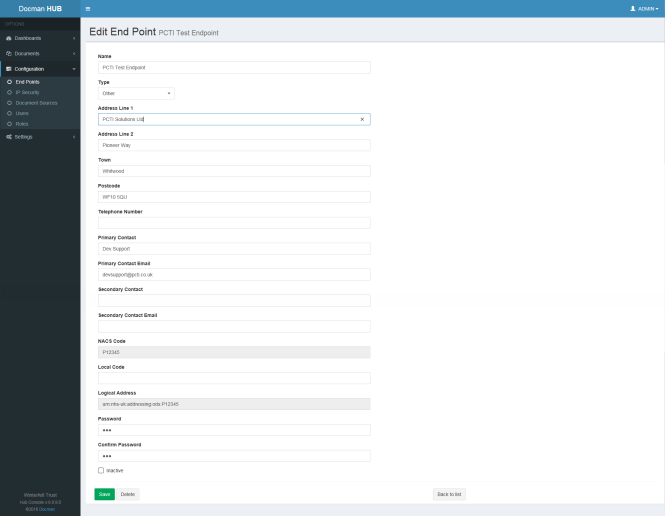
The End Point Details screen will be displayed with the fields all blank ready for you to enter the details of the End Point. |
|
|
The Name, Type, Primary Contact, Primary Contact Email and NACS Code fields are compulsory and must be filled in before the new End point can be saved. Password and Confirm Password are also required.
Once the fields are filled in as required, click Save to create the new End Point.
To view/edit an end point, click on the View/Edit drop-down button  located in the far right hand column of the end point list and select "Change end point settings". The End Point details screen will open and you will be able to see all of the details for the chosen End Point.
|
|
IP Security is an authentication method that stores a list of IP addresses. End Points connecting to the Hub through Scheduler are checked against this and allowed to connect based on their IP. Filters are provided in the panel at the top of the screen to allow you to easily locate a particular End Point.
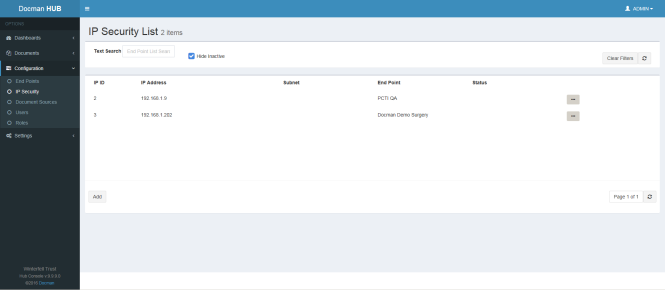
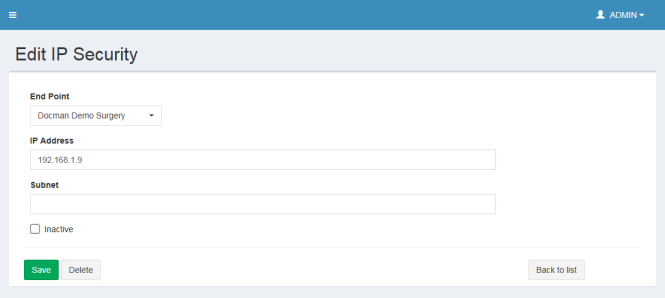
To view/edit an IP security record, click on the View/Edit  button located in the far right hand column of the IP security list.
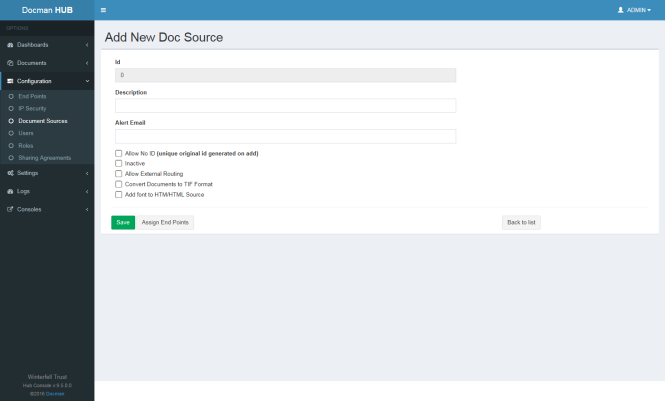
The document source list displays a list of all document sources on the Docman Hub. A search function is provided to enable you to find a Document Source easily.
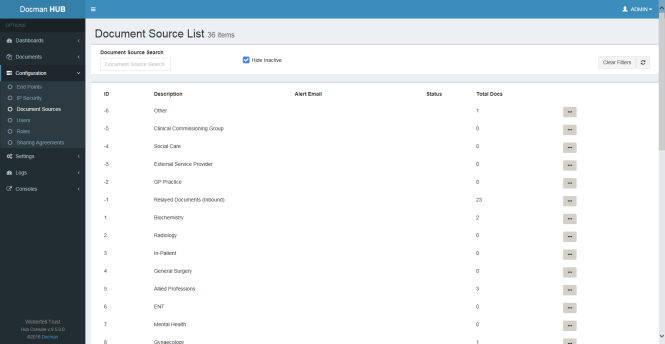
To view or edit a document source, click on the View/Edit  button located in the far right hand column of the document source list.
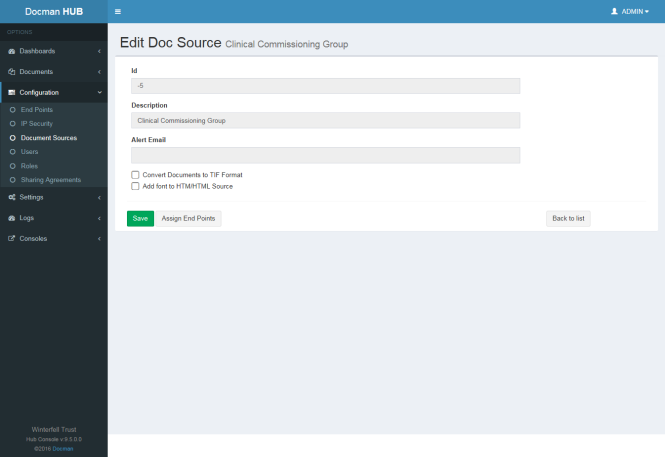
The Document Source Details screen will be displayed and you will be able to see the configuration details for the Document Source in detail.
The User List displays a list of all the user accounts on the Docman Hub. Above the list is a filter that allows you to exclude inactive users. In the list you will be able to see the User ID, the user’s name, a description, their role and whether they are inactive or active. From the User List you can add new users and edit existing users.
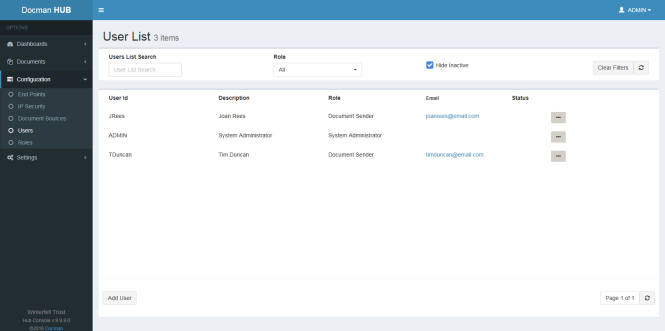
The User List will only display 30 users per page. If your Docman Hub has more than 30 users you can use the page drop-down menu or Next and Previous buttons (displayed at the bottom of the list) to navigate through your users.
|
|
|
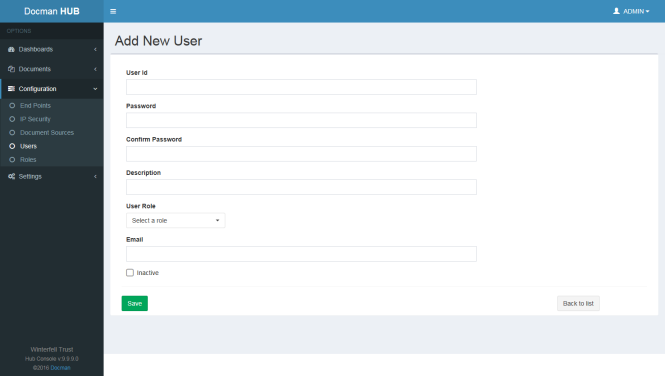
To add a Docman Hub Console user, click on the Add button at the bottom of the User List.
|
|
|
|
|
|
Add the required information into the fields in this screen. For help with this please see the information contained in the next sub section, Fields in the User Details Screen.
|
|
|
|
|
|
● User ID - This is the ID the user will use to log in to Docman Hub. This field can contain between 3 and 10 characters, which can be a mix of alpha and numeric characters.
● Password - You can add a password for your user here. Passwords can be up to 32 characters in length and should consist of alpha numeric characters. Passwords are not case sensitive.
● Confirm Password - Once you have added a password in the field above you need to retype it here to confirm it. If there is any difference between the two passwords you will be asked to enter them again when you try to save your new user details.
● Description - The description can be up to 100 characters in length and can contain alphanumeric and punctuation characters.
● User Role - The role can be selected from the drop down list. Roles can be viewed by clicking on Roles in the sidebar menu on the left of the screen.
● Email - Add the user's email address into this field. This will enable them to request a reset of their password and access the NHS email system. The new user will now appear in your User List and will have a numerical ID assigned.
To View/Edit an individual user, click on the graphic located in the far right hand column of the user list.
This will open the User Details screen.
When viewing a user, all of the fields are shown in much more detail then what is shown in the user list.
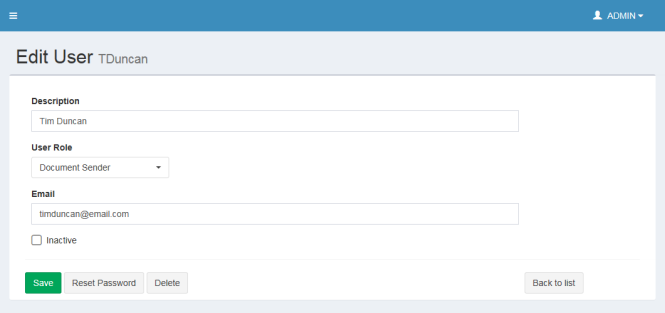
You can edit the user details and click on Save when you are finished.
When setting up a new user, you should associate them with a document source or a primary care facility. You will have a few users who do not require source assignment, such as Administrators.
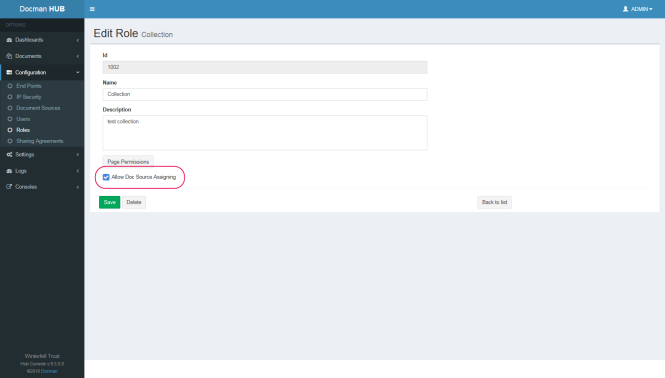
The user must be assigned a Role which has Allow Doc Source Assigning ticked.
Navigate to the Users section and open the Edit User screen by clicking the button. Click the Allowed Document Sources drop-down.
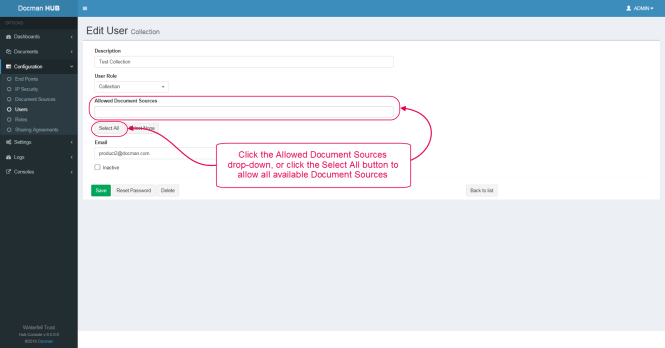
Scroll through the drop-down and select the Document Sources, or type into the drop-down to filter the list.

Click a Source to select it.

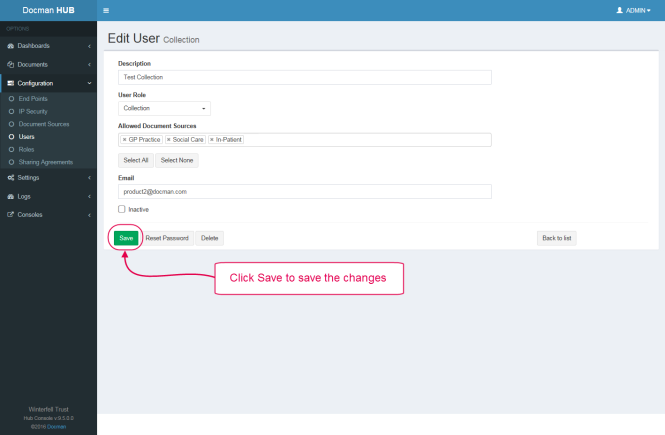
To select multiple Sources, repeat this process. To delete a Source, click the x to the right of the Source name.
To save the assigned Document Sources, click Save.
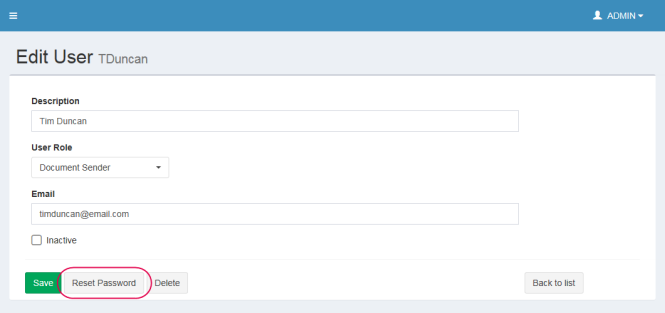
If one of your users forgets their password you will need to perform a password reset. Open the User Details and click on the Reset Password link next to the Password field.
When you click on Reset Password you will see a message displayed requesting confirmation of the reset. Click OK to continue with the reset.

Once the Reset is complete you will be returned to the User Details screen. Under the details there will be a red message displayed. This tells you what the temporary password is and reminds you that the user will have to change this on their next login.
You should now let the user know what their temporary password is and warn them that they will need to change it next time they login.
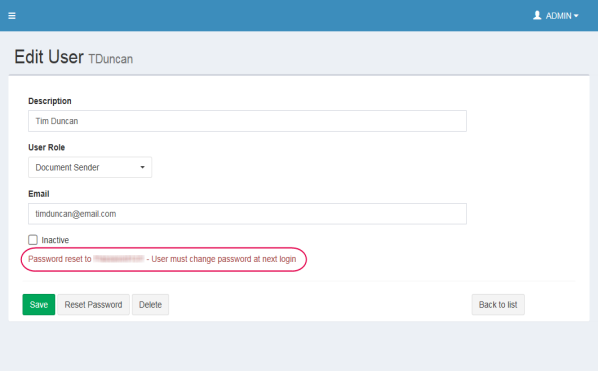
(The temporary password is blanked out in the above image for security reasons)
The Roles screen allows you to set up new user roles and edit existing user roles.
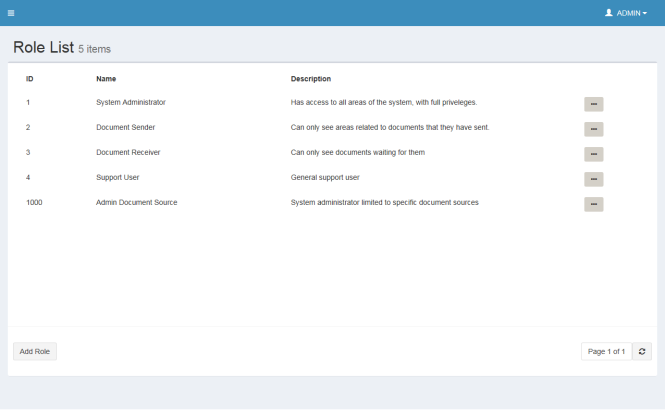
Click on the Add button to add a new role.
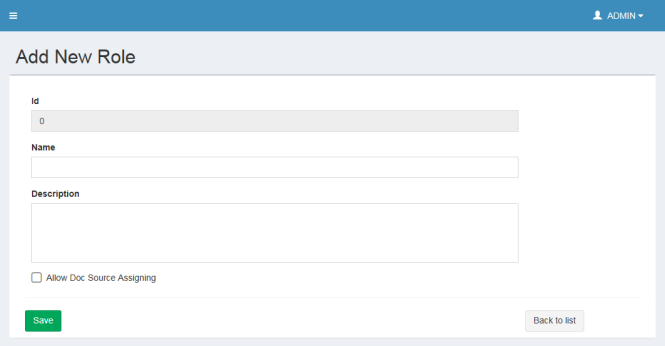
Select Allow Document Source Assigning if you would like to be able to apply settings to individual users that allow them to only see documents from their own document source(s).
Provide a name and description for the role then click on the Save button.
This will add the new role to the list. You will not be able to set up the actual permissions until the role has been created.
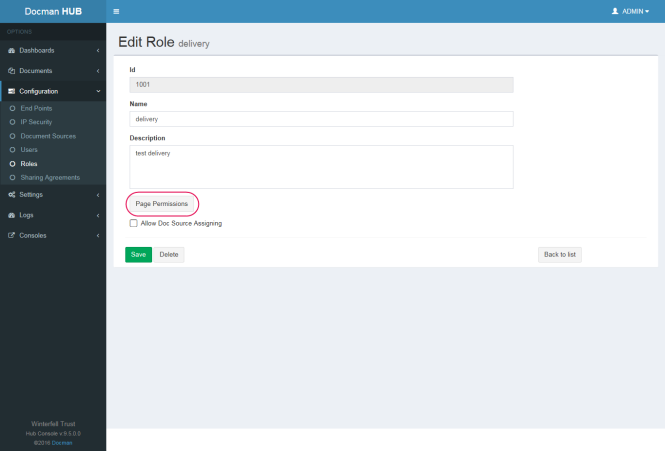
When you have a newly created role or you wish to add or remove permissions for an existing role, you will need to edit the role.
On the right hand end of each role in the list is the View/Edit button . Click the View/Edit button to open the Role Details screen, and then click on the Page Permissions button to assign new or edit existing permissions for the selected role.
This page allows you to edit the permission levels for a particular group of users who are assigned to a role. To get to this page you will have clicked on page permissions while editing a particular role. If this is a new role all permissions will be disabled (indicated by a white cross on a red roundel).
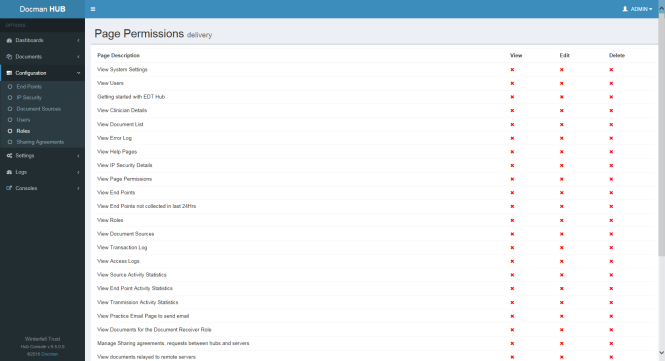
Select the permissions you wish to grant to people with the selected role by clicking on the View, Edit and Delete columns on the right. A tick is displayed for the permissions you are granting. Click Back to Role at the bottom of the page to return to the main Role settings, and then click Save.

The system settings list will display all system settings on the Docman Hub.
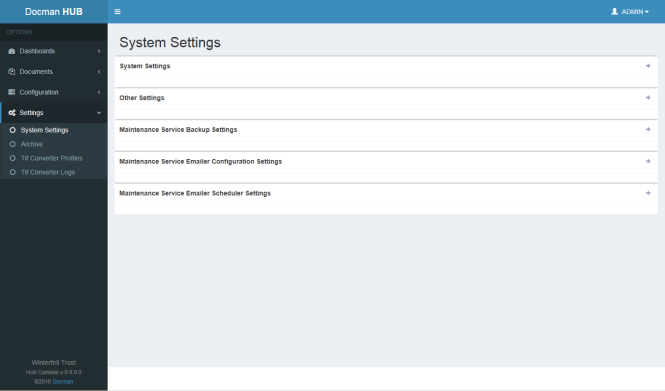
The system settings list is divided into five categories. Click the + icon to the right of each category name to expand the items list.
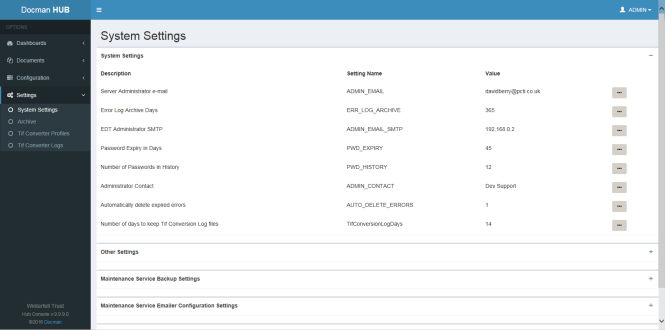
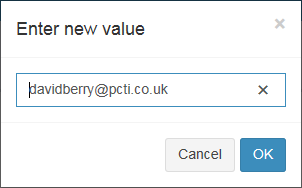
To view/edit a setting, click on the graphic located in the far right hand column of the system settings list.
When viewing a setting, all of the fields are shown in much more detail than what is shown in the system settings list.
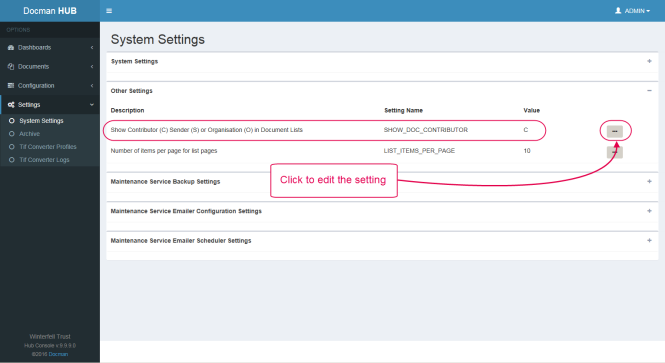
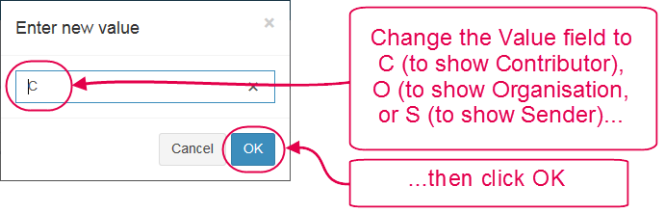
Hub Administrators are now able to choose between showing the sender, contributor or the organisation for documents in the Documents List. This setting is in the System Settings section of the Hub, under Other Settings.
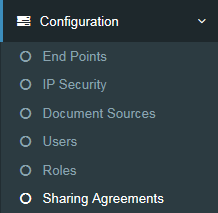
The Manage Sharing screen shows you a list of Docman Hubs you have a Sharing Agreement with. It is the Sharing Agreement that allows you to transfer documents with primary care facilities and secondary care facilities on other Docman Hubs.
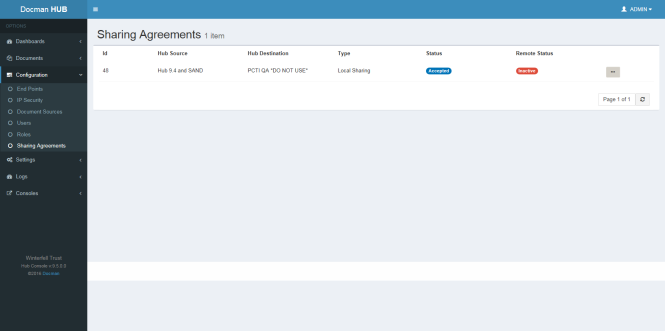
To enable document transfer across Docman Hubs, Docman maintains a list of active Docman Hubs known as the Discovery Service. The purpose of the Discovery Service is to enable you to discover and invite other Docman Hubs to a Sharing Agreement. Once an invitation and acceptance has been processed all communication is then made directly between your Docman Hub and the Docman Hub you have the Sharing Agreement with. The Discovery Service merely enables you to establish contact and process invitations and acceptances.
| Note: The agreement will allow the web service of each Docman Hub to talk to each other, the physical network infrastructure (in particular the firewall rules at each end of the relationship) must be configured to allow it to happen. |
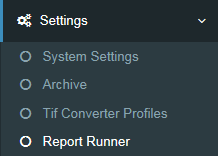
Report Runner provides users with a system to run detailed reports on the Hub server.
|
Note: Report results are based on your user account credentials. For example, if you only have access to one document source, you will only get report results from that source. |
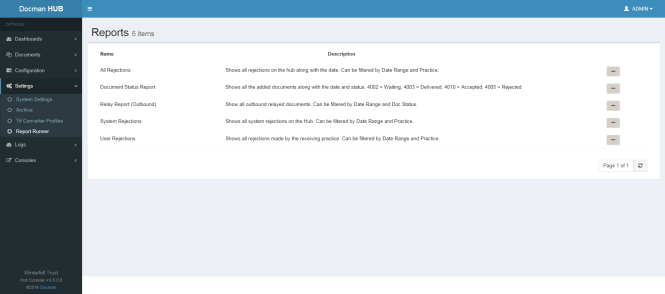
Each Report has a name and brief description of its function. Click on the on the right of a Report description to run a report or view further details.
Filters can be applied to a report before running. A series of headers are presented depending on the Report selected. Press the + icon to the right of a header name to expand the filter options.
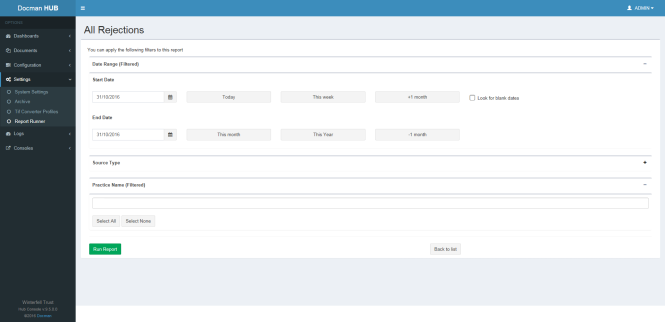
Click Run Report to perform the report.

The report generates and appears; in this case, we see four results based on the selected filters.
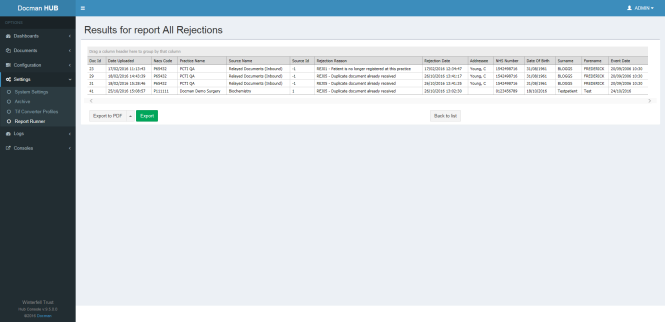
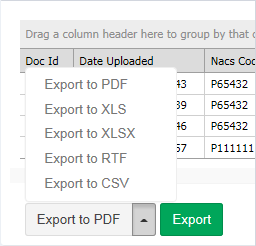
The results may be exported to a number of file formats using the Export function below the result list.
The service control manager has been replaced with an MVC application that contains all Hub configuration settings.
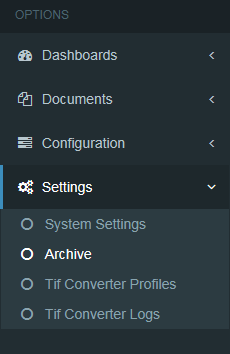
The maintenance service configuration may be accessed using the Configure Maintenance option, under the Configuration section of the Hub menu.
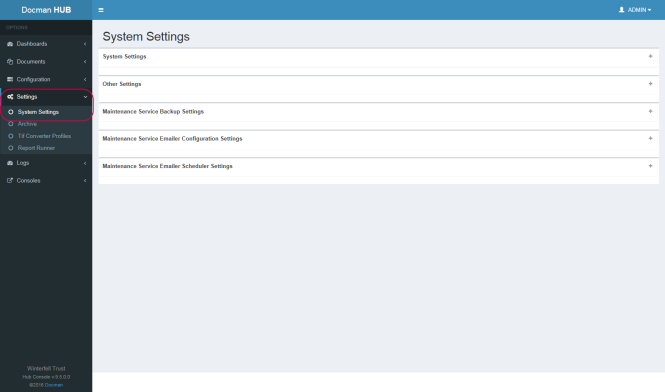
The maintenance configuration is split into three sections; Backup Configuration, E-Mailer Configuration and E-Mailer Scheduler.
The backup configuration allows the backup start time, location and log file location to be specified. The backup may also be configured to run on weekends, if required.

The Hub may be configured to send regular updates to the Hub Administrators. To do this, the Hub needs to be supplied with information on the SMTP server, authentication (if any is required) and address details.
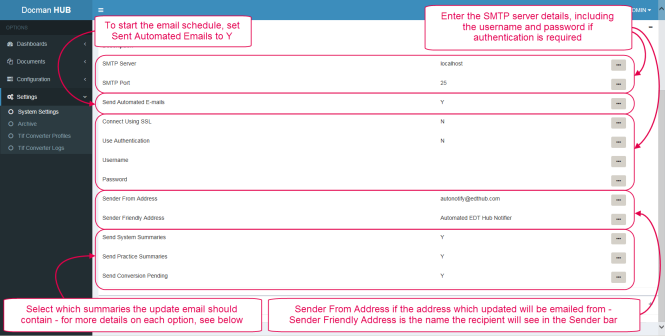
The E-Mailer Configuration lists three summary types which may be reported in the update email.
Send System Summaries sends an update on the Hub system itself, including the overall number of documents transmitted.
Send Practice Summaries sends an update on each practice's status, including the number of documents sent, received and accepted.
Send Conversion Pending sends an update on documents that are pending conversion. As the conversion process should be instant except in cases of problems with the TIFF Converter, a high number of documents pending conversion may be an early sign that Administrator attention is required on the Hub.
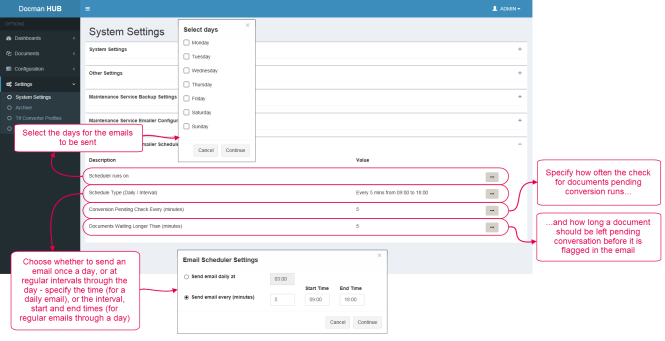
Once the e-mailer configuration is filled in, the scheduler information may be set up. This specifies the days and time(s) that the scheduled emails will be sent. The E-Mail Scheduler section is located below the Configuration section.
The update email contains information on documents that are pending conversion. As the conversion process should be instant except in cases of problems with the TIFF Converter, a high number of documents pending conversion may be an early sign that Administrator attention is required on the Hub. The settings of the pending document check may also be changed under the E-Mail Scheduler settings.
Hub documents, audits and metadata may be archived using the new Archiver tool. Users assigned to the System Administration group can configure archiving sessions, back data up to a chosen area and bulk-delete items using this tool.
Archiving removes delivered and deleted documents from the live Hub, reducing database and file store size and helping to maintain the efficiency of the system. The archive also runs as a backup, allowing data to be securely stored according to the Hub Administrators’ regulations. This replaces the retention policy on the Hub. Database size can only be reduced by using this functionality.
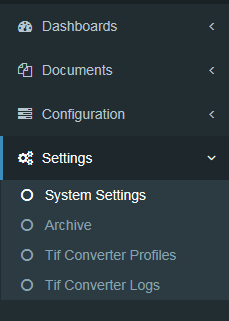
The Archiver may be accessed using the Archive option, under the Settings section of the Hub menu.
![]()
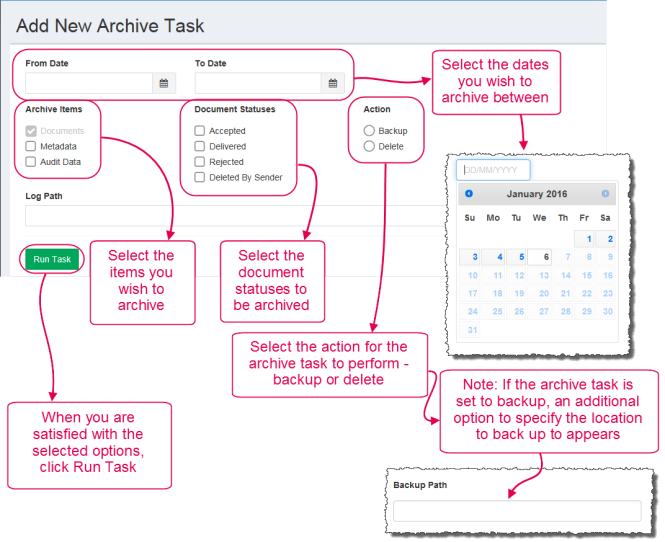
Three options are available for archive.
Documents refers to the actual document files. When backed up, these are placed in the chosen location in their original formats.
Metadata refers to the data attached to the document - patient details, date of encounter, organisation/department.
Audit Data refers to the audit data for the document - date and time of upload, identity of user that uploaded the document.
The documents tickbox is pre-selected and mandatory. Any combination of metadata and audit data may be archived.
One of two options may be selected for the action that the archive performs.
Backup backs the chosen documents up in their original formats to the user-specified location. Metadata and audit data, if selected, is saved in .xls format.
If backup is chosen, a second text field appears for a backup path. This must be an existing directory local to the Hub server.
Delete deletes the chosen files from the Hub.
| Warning: The Delete action will permanently delete the chosen files from the Hub. |
|
Please Note: If the Rejected document status is selected for archiving, only the user-rejected documents will be archived. System-rejected documents are not archived, and should be investigated so they are successfully transmitted to the practice.
Additionally, documents with the status Accepted which are expected to be posted to the Vault will not be archived until they are sent to the Vault. Accepted documents which are posted to Vault, or which are from a document source where Vault is not enabled, will be archived as normal. |

|
Follow Docman!
|
|
|
Docman is the trading name of PCTI Solutions Ltd. Pioneer Court, Pioneer Way Whitwood, Castleford WF10 5QU © 2000-2015 PCTI Solutions Ltd. Docman is the trading name of PCTI Solutions Limited, a company registered in England, company number 3342552 and registered address Pioneer Court, Pioneer Way, Castleford, WF10 5QU. VAT Registration No: 698853945. |